
Two gluten-free flours do two different jobs here, and they are not interchangeable. A plain all-purpose blend thickens the filling; a baking blend with xanthan gum makes the biscuits, because without the gum they would not hold together at all.
The biscuits go on raw. Dropped straight onto the hot filling and baked for twenty-five to thirty minutes, they set against it — which is what gives a pot pie its sealed, cut-open look.
Why This Recipe Works
- A three-tablespoon roux thickens two cups of broth and a cup of milk into a filling that holds a biscuit up.
- Grating the cold butter into the dry mix distributes it without warming it, which is what makes the biscuits rise.
- Buttermilk reacts with the baking powder for lift that gluten-free dough cannot get from structure.
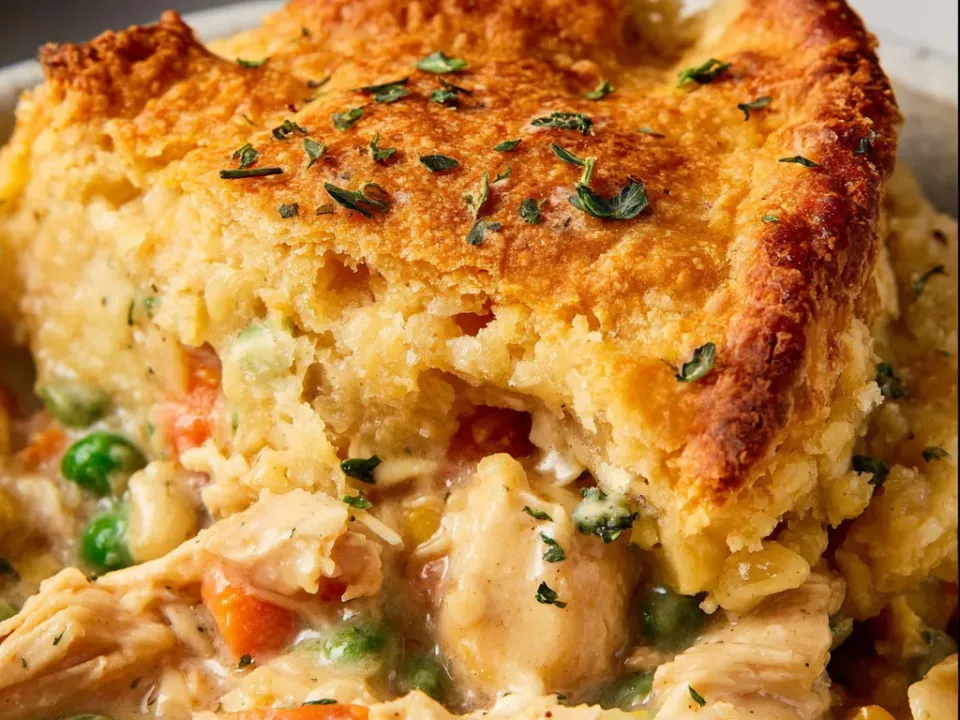
- Brushing melted butter over the raw dough is what browns the tops to the deep golden the finished dish shows.
Ingredient Notes
- Two gluten-free flours
- Three tablespoons of a plain all-purpose blend for the roux, and two cups of a baking blend with xanthan gum for the biscuits. The gum is why they hold.
- Cold butter, grated
- Six tablespoons, grated into the dry mix. Cold and in small pieces is what makes a biscuit rise.
- Cooked shredded chicken
- Three cups, already cooked. The bake brings the casserole to 165 degrees Fahrenheit rather than cooking raw chicken.
How to Make It
Start the filling
Heat oven to 400 degrees Fahrenheit. Cook onion in 3 tbsp butter for 5 minutes. Stir in gluten-free flour for 1 minute, then whisk in broth and milk.
Finish and spread it
Simmer until thickened; stir in chicken, peas and carrots, salt, pepper and thyme. Spread in a 9-inch baking dish.
Make the biscuit dough
Whisk baking flour, baking powder and garlic powder. Cut in cold butter, then stir in cheddar and buttermilk just until a dough forms.
Drop it on the hot filling
Drop biscuit dough directly over the hot filling so it bakes on the dish; brush with melted butter.
Bake to 165F
Bake 25 to 30 minutes until biscuits are deep golden and the center of the casserole reaches 165 degrees Fahrenheit. Finish with parsley.
Why the Biscuit Goes On Raw
The order this chicken pot pie is assembled in is what the whole recipe turns on.
The filling, thickened first
Onion softened in 3 tbsp butter, 3 tbsp of plain gluten-free flour cooked for a minute, then 2 cups of broth and 1 cup of milk whisked in and simmered until thick. Chicken, peas and carrots, thyme, salt and pepper stirred through.
Spread hot into the dish
Into a 9-inch baking dish while it is still hot. That heat is what begins setting the underside of the dough the moment it lands.
The dough, dropped raw
2 cups of gluten-free baking blend with xanthan gum, baking powder and garlic powder, cold butter grated in, then cheddar and buttermilk stirred just to a dough. Dropped straight onto the filling - not rolled, not pre-baked.
Melted butter over the top
2 tbsp brushed on before it goes in. Gluten-free dough browns reluctantly, and this is what gets it to deep golden.
25 to 30 minutes at 400F until the biscuits are deep golden and the centre reads 165F. Cut open, the biscuit and the filling are one dish rather than two.
Success Tips
- Use ingredients certified gluten-free to keep the pot pie gluten-free.
- Stir the dough just until it forms; overworking a gluten-free biscuit makes it dense.
- Drop the dough on while the filling is still hot — that is what sets the underside of the biscuit.
Serving Ideas
Six servings from the 9-inch dish, cut through the golden biscuit top into the creamy chicken, pea and carrot filling, finished with parsley.
Frequently Asked Questions
Can I bake the biscuits separately and put them on top?
No. They are dropped onto the hot filling and baked on the dish, which is what makes it a pot pie.
Can I use one gluten-free flour for both parts?
The recipe specifies a plain blend for the roux and a baking blend with xanthan gum for the biscuits.
How do I know it is done?
The biscuits should be deep golden and the centre of the casserole should reach 165 degrees Fahrenheit.