

Nine ingredients, twenty-five minutes of work, and a 9-inch square dish that goes into the fridge for four hours.
Every layer is spread onto the one below it, so each has to be firm enough to take the next. That is why the crust is pressed and why the pudding is whisked thick before it goes anywhere.
Why This Recipe Works
- Melted butter through crushed Oreos makes a crust that holds together when it is cut.
- Pressing the crust firmly is what stops the base crumbling under the layers above.
- Powdered sugar beaten into cream cheese sweetens without the grain granulated sugar would leave.
- Instant pudding whisked with cold milk thickens in minutes and stays sliceable.
- Four hours of chilling sets every layer at once, which is what allows a clean square.
Ingredient Notes
- Oreo cookies, in two places
- Thirty crushed for the crust and another cup of crumbs for the top layer. The same cookie doing structural work at the bottom and decorative work at the top.
- Instant chocolate pudding
- One 3.9 oz box with two cups of cold milk. Instant and cold specifically — it has to thicken without heat.
- Whipped topping
- Eight ounces, thawed. The white layer, and it is spread rather than folded into anything.
- Pastel candy eggs
- A cup, scattered on last. They are what makes this the Easter version rather than a plain dirt cake.
How to Make It
Press the crust
Mix 2 cups crushed Oreos with melted butter and press firmly into a 9-inch square dish.
The cream cheese layer
Beat cream cheese with powdered sugar until smooth and spread over the crust.
The chocolate layer
Whisk pudding mix with cold milk until thick, then spread over the cream-cheese layer.
White layer, then crumbs
Spread whipped topping over the chocolate layer and cover with additional Oreo crumbs.
Pastel eggs on top
Scatter pastel candy eggs over the top.
Four hours, then cut
Refrigerate at least 4 hours before cutting into layered squares.
Five Layers, Bottom to Top
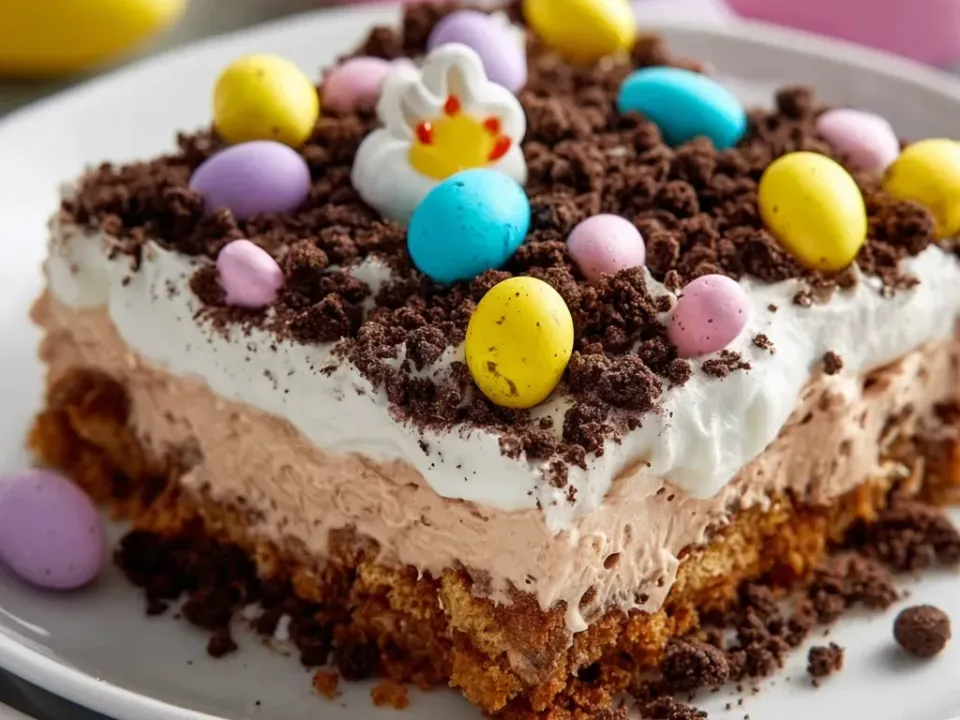
A cut square shows the whole recipe at once. Each layer has to be firm enough to hold the one spread on top of it, which is why the order and the texture of each are fixed.
Four hours of cold
Not an ingredient, but the last layer of the method. At least 4 hours in the fridge before it is cut, because nothing here has been baked and chilling is the only thing that turns five soft layers into a square that holds its shape.
Crumbs, then eggs
1 cup of additional crushed Oreos over the whipped topping, then 1 cup of pastel candy-coated chocolate eggs scattered on top. The crumbs are the dirt the dessert is named for; the eggs are what make it the Easter version.
The white layer
8 oz of thawed whipped topping, spread over the chocolate. The visual break in the middle of a cut square, and the reason the layers read as separate rather than as one brown mass.
The chocolate layer
One 3.9 oz box of instant chocolate pudding whisked with 2 cups of COLD milk until thick, then spread. Instant pudding sets by hydration rather than by cooking - the one component that does its own thickening in minutes.
The cream cheese layer
8 oz of cream cheese beaten with 1/2 cup of powdered sugar until smooth, spread over the crust. Powdered rather than granulated sugar, because there is no heat anywhere in this recipe to dissolve a grain.
The crust - pressed firmly
2 cups of crushed Oreos with 5 tbsp of melted butter, pressed FIRMLY into a 9-inch square dish. Pressed rather than scattered: this is the only structural layer, and everything above it is soft.
Success Tips
- Press the crust down hard — a loose base is where a layered square falls apart.
- Whisk the pudding until it is genuinely thick before it goes on the cream cheese.
- Give it the full four hours; two will not cut cleanly.
Serving Ideas
Twelve layered squares onto white plates, each showing the cookie-crumb base, the chocolate cream layer, the white whipped layer and the crumbs and pastel candy eggs on top.
Frequently Asked Questions
Can I serve it sooner than four hours?
It will not cut into squares. Nothing in this dessert is baked, so the fridge is doing all the setting.
How is this different from the Easter Oreo balls?
The form. Both are no-bake and built on Oreos and cream cheese, but this is a layered casserole cut into squares and that one is individual coated balls.
How should it be kept?
Refrigerated. It contains dairy throughout and should not sit at room temperature for more than two hours.