

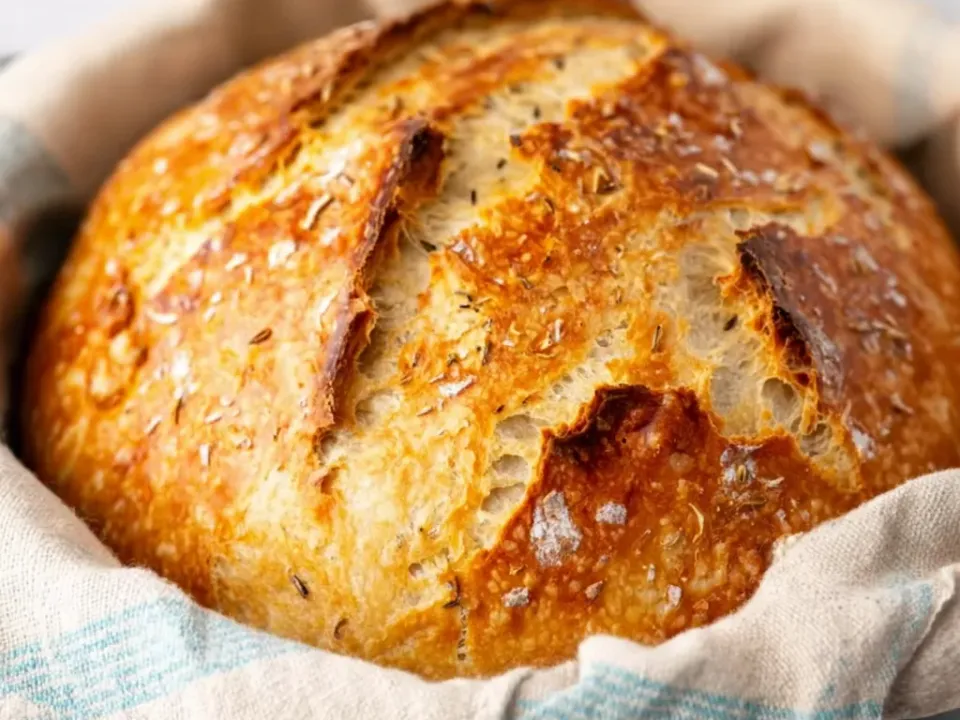
Flour, salt and instant yeast stirred together, then mixed with warm water into a sticky dough with no kneading at all, covered and left at room temperature for twelve to eighteen hours.
The risen dough folds over itself a few times, rests thirty minutes, and lowers on its parchment into a Dutch oven that has preheated empty at 450°F for half an hour, baking covered then uncovered until deeply browned.
Why This Recipe Works
- A twelve-to-eighteen-hour rise does the work kneading would normally do. Given that much time, the dough develops gluten structure and flavour slowly on its own, which is the entire premise of the no-knead method.
- The Dutch oven preheats EMPTY for thirty minutes before the dough goes in. A pot that hot gives the dough an immediate blast of heat the moment it is lowered in, which is what produces real oven spring.
- Baking covered first traps the steam the dough itself releases as it heats. That trapped moisture is what gives the crust its shine and crackle — commercial bakeries achieve the same effect with steam-injected ovens.
- The lid comes off for the final twelve to fifteen minutes so the crust can actually brown. Left covered the whole time, the loaf would stay pale even after it was fully baked through.
- The dough is deliberately left sticky rather than worked until smooth. A drier dough would not develop the same open, airy crumb this method is known for.
Four Ingredients, Mostly Time
There is very little technique in this recipe in the usual sense — no kneading, no shaping beyond a few folds. What replaces it is a long, unattended rise and a very hot, tightly covered pot.
Mix
Flour, salt and instant yeast stirred together, then water mixed in just until no dry flour remains. The dough is deliberately sticky.
Rise
Covered and left at room temperature for twelve to eighteen hours — this long, slow fermentation is what develops the flavour a kneaded dough would otherwise need working to build.
Shape and rest
Folded over itself a few times on a floured surface and gently shaped into a ball, then rested thirty minutes on parchment.
Preheat the pot
A covered Dutch oven heated empty in the oven at 450°F for thirty minutes, so it is genuinely scorching before the dough goes anywhere near it.
Bake covered, then uncovered
Thirty minutes with the lid on, trapping the steam that builds the crust, then twelve to fifteen minutes uncovered until deeply browned.
How to Make It
Mix the dough
Stir flour, salt, and yeast together. Add water and mix until no dry flour remains; dough will be sticky.
Long rise
Cover and let rise at room temperature 12 to 18 hours.
Shape and rest
Turn dough onto a floured surface, fold over itself a few times, and shape gently into a ball. Rest 30 minutes on parchment.
Preheat the pot
Place a covered Dutch oven in oven and heat to 450°F for 30 minutes.
Bake covered, then uncovered
Lower dough and parchment into hot pot. Cover and bake 30 minutes, then uncover and bake 12 to 15 minutes until deeply browned.
Cool
Cool at least 1 hour before slicing.
Ingredient Notes
- Instant yeast
- Only half a teaspoon, because the twelve-to-eighteen-hour rise gives even that small amount all the time it needs to leaven the whole loaf slowly.
- All-purpose flour
- Three cups, with no other flour blended in — a plain flour is what this method is built and tested around.
- Warm water
- One and a half cups, mixed in just until no dry flour remains. The resulting dough is meant to be sticky rather than smooth.
- Kosher salt
- One and a half teaspoons, stirred into the dry ingredients before the water goes in, so it distributes evenly through such a simple dough.
Success Tips
- Do not rush the twelve-to-eighteen-hour rise — the long time is what replaces kneading.
- Handle the risen dough gently when shaping; a few folds is enough.
- Preheat the Dutch oven the full thirty minutes, empty, before the dough goes in.
- Keep the lid on for the full thirty minutes to trap steam.
- Let the loaf cool the full hour before cutting into it.
Serving Ideas
Serve sliced, plain or with butter — the crust and open crumb are the point, and the loaf needs no dressing up.
Storage and Reheating
Refrigerate
Store cut-side down at room temperature, wrapped in a towel or paper bag, for up to 2 days. Avoid sealing it in plastic, which softens the crust.
Freeze
Freeze the whole cooled loaf, well wrapped, for up to 3 months. Thaw at room temperature, then a few minutes in a hot oven revives the crust.
Reheat
A few minutes in a hot oven brings the crust back to life. A microwave will only soften it.
Frequently Asked Questions
Can I shorten the rise time?
The twelve-to-eighteen-hour window is what this no-knead method relies on to develop structure and flavour without any working of the dough. A shorter rise would leave a denser, less developed loaf.
I don't have a Dutch oven.
Any heavy, oven-safe pot with a tight-fitting lid that can handle 450°F will work the same way — the covered, very hot vessel is what matters, not the specific brand of pot.
My dough seems too wet to handle.
That is expected — the recipe describes it as deliberately sticky. A well-floured surface and hands make the shaping step manageable without needing to add extra flour to the dough itself.
My crust came out soft instead of crackling.
Check that the Dutch oven was genuinely preheated for the full thirty minutes and that the lid stayed on for the covered portion of the bake — both are what trap the steam the crust depends on.