
Desserts
Cheesecake Bars with Chocolate Chips: Irresistibly Creamy & Gooey!

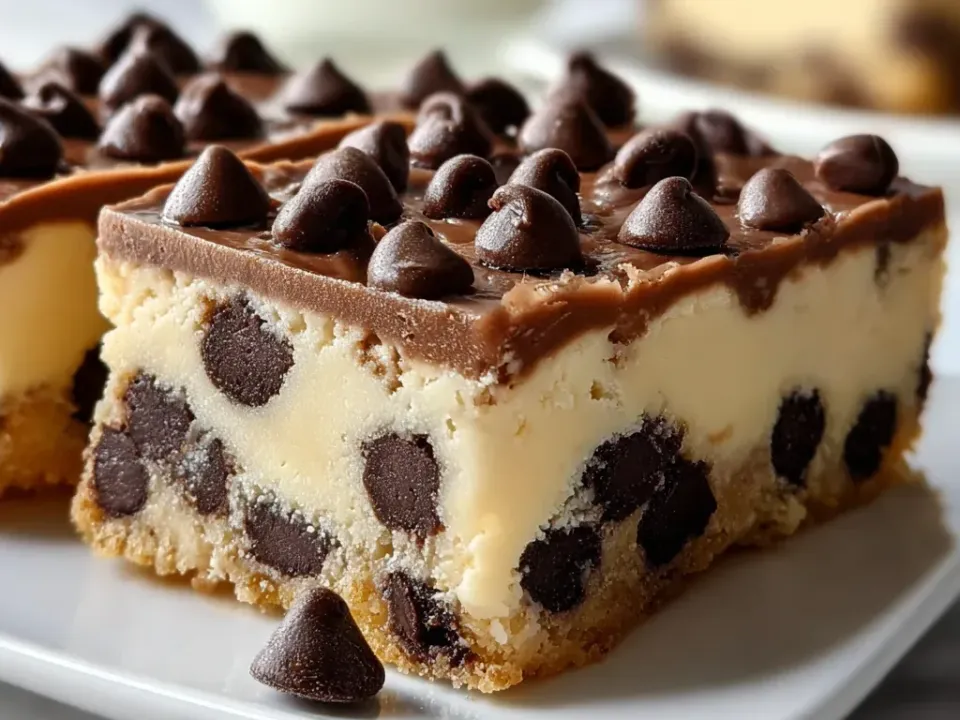
Cheesecake Bars with Chocolate Chips are my absolute weakness—that perfect balance of creamy, tangy cheesecake and decadent chocolate chips nestled in a buttery graham cracker crust. Every time I make these, my kitchen fills with that unmistakable vanilla-kissed aroma that makes it nearly impossible to wait until they’re properly chilled. I still remember the first time I brought these to my sister’s housewarming; they disappeared faster than any other dessert! If you love the richness of New York cheesecake but crave something more portable and chocolate-studded, these bars are your dream come true.
Recipe
Why You’ll Love These Cheesecake Bars with Chocolate Chips
Perfect Balance of Flavors and Textures
There’s something magical about the way these cheesecake bars with chocolate chips hit all the right notes. The velvety cheesecake filling is tangy and sweet without being cloying, while the chocolate chips add bursts of rich cocoa goodness in every bite. I adore how the graham cracker crust provides that perfect textural contrast—slightly crunchy yet tender enough to yield easily to your fork. The first time I served these at a dinner party, my friend Melissa literally closed her eyes and sighed after her first bite. That’s the reaction you’ll get too—pure, blissful satisfaction that makes the minimal effort completely worthwhile.
Make-Ahead Convenience
One of my favorite things about these cheesecake bars with chocolate chips is how perfect they are for planning ahead. You can prepare them up to three days before your event, which is a lifesaver when you’re hosting. The flavors actually develop and meld together beautifully during refrigeration, making them taste even better on day two! I often make these on Friday for weekend gatherings, and it’s such a relief to have a show-stopping dessert ready to go. Plus, unlike traditional cheesecake, these bars set more quickly and are much more forgiving if you’re newer to baking cheesecake. The chocolate chips also help mask any minor imperfections!
Essential Tips & Tricks
Perfecting Your Ingredients
Starting with room temperature ingredients makes all the difference in your cheesecake bars with chocolate chips. Cold cream cheese will leave you battling lumps forever! I learned this the hard way when I once tried to rush the process—never again. Set your cream cheese, eggs, and sour cream on the counter for at least 30 minutes before beginning. Another game-changer is using high-quality chocolate chips—I prefer semi-sweet for the perfect balance, but dark chocolate chips create a more sophisticated flavor profile. And don’t forget to toast your graham cracker crumbs slightly before mixing with butter for that enhanced nutty flavor that elevates the entire dessert.
Mastering the Technique
The secret to silky-smooth cheesecake bars with chocolate chips lies in how you mix your batter. Over-mixing introduces too much air, which can cause cracks and an uneven texture. I use my mixer on low speed and stop as soon as ingredients are incorporated. Another crucial technique is the water bath—even for bars! Place your pan inside a larger one filled with about an inch of hot water. This creates gentle, even heat that prevents the dreaded crack across the top. For chocolate chip distribution, I like to fold in half the chips and then sprinkle the rest on top, giving you that beautiful bakery-style finish that looks professionally done.
Serving Ideas & Creative Variations
Elegant Presentation Options
Transform these cheesecake bars with chocolate chips into an impressive dessert spread with thoughtful presentation. Cut them into precise squares using a hot knife (run under hot water, then wipe dry between cuts) for that professional look. I love arranging them on a white platter with fresh berries scattered around—the color contrast is stunning! For dinner parties, try individual servings on small plates with a light dusting of cocoa powder and a mint leaf. During the holidays, I add a tiny dollop of whipped cream and a raspberry to each bar. The red and white against the creamy cheesecake creates a festive display that guests always photograph before devouring.
Flavor Twists and Add-ins
While classic cheesecake bars with chocolate chips are divine, experimenting with variations keeps things exciting! My personal favorite twist is adding 2 tablespoons of espresso powder to the filling—it enhances the chocolate flavor without tasting coffee-forward. For a festive twist, try folding in crushed peppermint candies during the holidays. Nutella swirls are another crowd-pleaser—just warm 1/4 cup slightly and swirl it through the batter before baking. If you’re feeling adventurous, try a caramel drizzle over the cooled bars, or swap the graham crackers for crushed Oreos in the crust. Each variation maintains the cheesecake’s integrity while offering a delightful surprise.
Storage & Troubleshooting Guide
Proper Storage Techniques
Storing your cheesecake bars with chocolate chips properly ensures they maintain that perfect creamy texture. Always cool them completely at room temperature before refrigerating to prevent condensation from forming on top. I like to cover them loosely with foil rather than plastic wrap, which can stick to the surface. They’ll keep beautifully in the refrigerator for up to 5 days, though they rarely last that long in my house! For longer storage, these bars freeze exceptionally well. Cut them first, then freeze on a baking sheet until solid before transferring to a freezer container with parchment between layers. This way, you can thaw individual portions whenever a craving strikes.
Fixing Common Issues
Even experienced bakers encounter challenges with cheesecake bars with chocolate chips occasionally. If your bars develop cracks, don’t panic! A simple chocolate ganache poured over the top not only hides imperfections but adds another layer of decadence. For a too-soft center, it likely needs more time in the oven—next time, look for a slight jiggle in just the center, not across the entire surface. If your crust gets soggy, try baking it for 8-10 minutes before adding the filling. And for chocolate chips that sink to the bottom, try coating them in a teaspoon of flour before folding into the batter. This light coating helps them stay suspended throughout the filling.
Frequently Asked Questions
Can I make these cheesecake bars with chocolate chips without a water bath?
Yes, you can skip the water bath, but your bars may crack on top. To minimize this, bake at a lower temperature (325°F instead of 350°F) and leave them in the turned-off oven with the door cracked for 30 minutes after baking.
How do I know when my cheesecake bars are perfectly done?
Look for set edges with a slight jiggle in the center when you gently shake the pan. The center should not be liquid but should move slightly. They’ll continue to set as they cool.
Can I use low-fat cream cheese for this recipe?
I don’t recommend it. Full-fat cream cheese provides the rich, creamy texture that makes these bars special. Low-fat versions contain more water and can result in a less stable dessert.
My chocolate chips sank to the bottom. What went wrong?
Toss your chocolate chips in a teaspoon of flour before adding them to the batter. This helps them stay suspended throughout the filling during baking.
How far in advance can I make these for a party?
These cheesecake bars with chocolate chips can be made up to 3 days in advance. The flavors actually improve after a day in the refrigerator!
Final Thoughts
These cheesecake bars with chocolate chips have become my signature dessert for good reason—they strike that perfect balance between impressive and achievable. Every time I make them, I’m reminded of how simple pleasures often create the most memorable moments. The way conversation flows more easily when everyone’s enjoying something delicious, the appreciative murmurs as people take their first bites. I’d love to see your creations if you try this recipe—tag me on Pinterest so I can celebrate your baking success!