
Desserts
New York Cheesecake with Berry Twist: Irresistibly Delicious Delight!
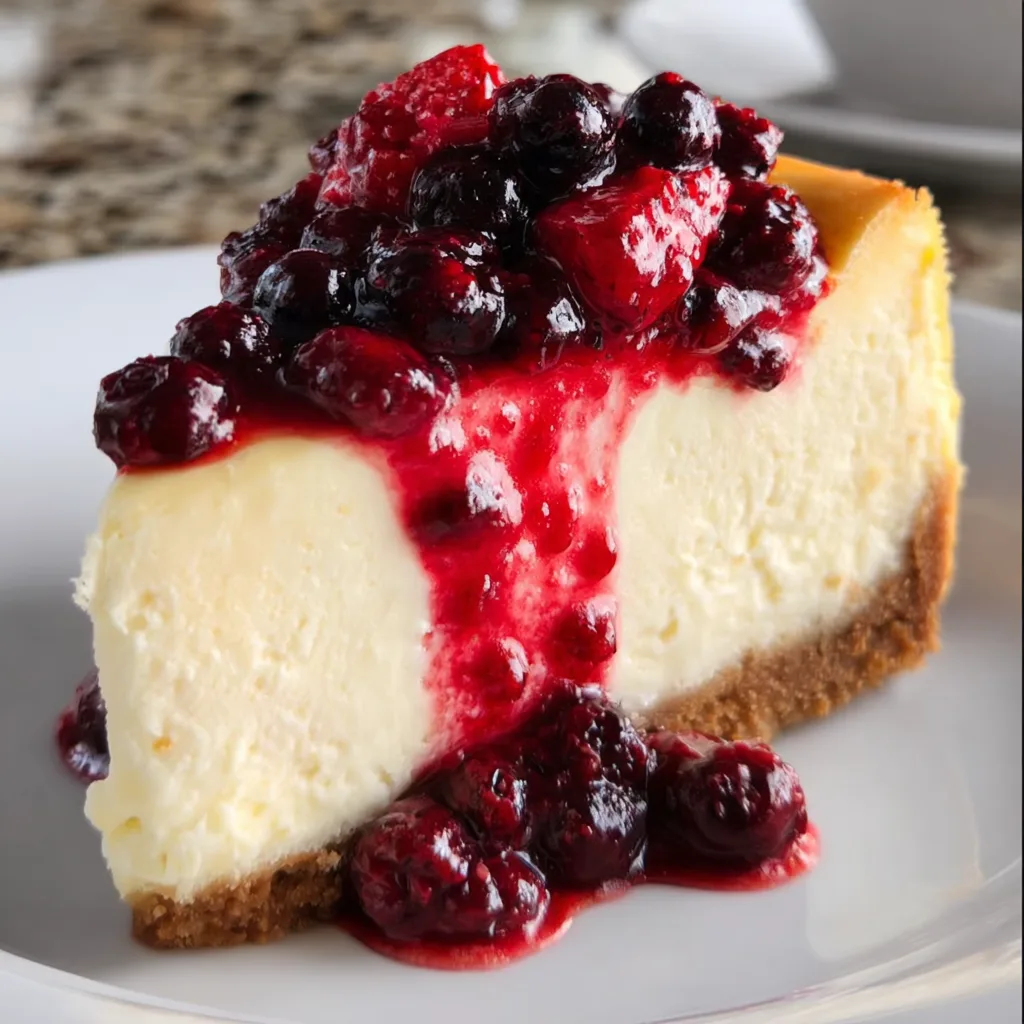
This New York Cheesecake with Berry Twist has completely transformed my dessert game! There’s something magical about that perfect balance between creamy, velvety cheesecake and the bright pop of mixed berries. The first time I made this for my sister’s birthday, the room fell silent as everyone took their first bite—that’s when I knew I had a winner. The contrast between the rich, tangy filling and the sweet-tart berry swirl creates a dessert that’s both classic and unexpected. Trust me, this will become your new go-to when you want to impress without spending hours in the kitchen.
Recipe
Why You’ll Love This New York Cheesecake with Berry Twist
Perfect Balance of Flavors and Textures
The beauty of this New York Cheesecake with Berry Twist lies in its perfect contrast of flavors. The traditional cheesecake base delivers that rich, creamy tanginess that melts in your mouth, while the berry swirl cuts through with bright, fruity notes that dance on your tongue. I love how the graham cracker crust provides a buttery, slightly sweet foundation that holds everything together. The texture is what truly sets it apart—dense and velvety in the center with a slightly firmer edge that gives you that authentic New York-style bite. When you pull it from the oven with that slight wobble in the center, you’ll know you’re in for something special.
Quick Prep with Stunning Results
Don’t let the elegant appearance fool you—this cheesecake is surprisingly beginner-friendly! The prep takes just 20 minutes of hands-on time, making it perfect for busy weeknights when you’re craving something special. I’ve found that using room temperature ingredients is the real secret to achieving that silky-smooth texture without spending hours in the kitchen. The berry swirl might look complicated, but it’s actually just a simple drag of a knife through dollops of berry puree. I still remember the first time I made this for my book club—everyone thought I’d spent all day on it! The dramatic presentation belies how straightforward the process actually is.
Essential Tips & Tricks
The Water Bath Method
Using a water bath is non-negotiable for achieving that perfectly creamy texture without cracks. I learned this the hard way after my first three cheesecakes looked like the Grand Canyon! Wrap your springform pan in heavy-duty aluminum foil (double layer!) to prevent water seepage, then place it in a larger roasting pan. Pour hot water halfway up the sides of the springform pan before baking. The gentle, moist heat helps the cheesecake bake evenly and prevents that dreaded crack across the top. Think of it as giving your cheesecake a spa treatment—it deserves the pampering! If you’re looking for another dessert that benefits from careful technique, check out my Mini Cherry Cheesecakes.
The Perfect Berry Swirl
Creating that gorgeous berry swirl is easier than it looks! Start by pureeing your favorite berries (I love using a mix of raspberries, blackberries, and blueberries) with a touch of sugar. Strain the mixture to remove seeds if you prefer a smoother texture. After pouring your cheesecake batter into the crust, dollop the berry puree on top in small spoonfuls. Then use a toothpick or knife to gently swirl in a figure-eight pattern. The key is not to over-swirl—less is more here! You want distinct ribbons of color rather than a uniform pink mixture. This technique creates that wow-factor that makes everyone reach for their phones to snap a picture.
Serving Ideas & Creative Variations
Seasonal Berry Adaptations
One thing I adore about this New York Cheesecake with Berry Twist is how versatile it is throughout the year. In summer, fresh strawberries and blueberries create a patriotic swirl that’s perfect for July gatherings. Fall calls for blackberry and fig combinations that bring a deeper, more complex flavor profile. Winter? Try cranberry and orange for a holiday twist that’ll make your guests swoon. The berry component can be adapted to whatever’s in season, making this a year-round favorite. I’ve even used frozen berries in a pinch—just thaw and drain excess liquid first. The seasonal adaptability means this cheesecake never gets boring, no matter how often you make it.
Complementary Toppings and Sides
Elevate your cheesecake experience with thoughtfully chosen accompaniments. A dollop of lightly whipped cream with a hint of vanilla creates the perfect neutral backdrop for the berry flavors to shine. For texture contrast, sprinkle some crushed graham crackers or toasted sliced almonds around the edge of each slice. My personal favorite pairing is a small scoop of lemon sorbet on the side—the bright citrus notes complement the berries beautifully. For a dinner party finale that will leave everyone talking, serve alongside my Roasted Tomato Salsa for guests who prefer savory flavors to cleanse their palate between bites of cheesecake.
Storage & Troubleshooting Guide
Proper Storage Techniques
Keeping your New York Cheesecake with Berry Twist fresh is all about proper refrigeration. Once completely cooled, cover the cheesecake with plastic wrap or store in an airtight container. It will maintain peak freshness for up to 5 days in the refrigerator, though the texture is absolute perfection on days 2-3. For longer storage, you can freeze individual slices wrapped tightly in plastic wrap and then aluminum foil. They’ll keep for up to 2 months this way. When you’re ready to enjoy, thaw overnight in the refrigerator—never at room temperature or in the microwave. The slow thaw preserves that silky texture that makes this cheesecake so special.
Fixing Common Cheesecake Problems
Even experienced bakers encounter cheesecake challenges, but most are easily fixable. If you notice cracks forming during baking, don’t panic! Turn off the oven, prop the door open slightly, and let the cheesecake cool gradually for an hour before removing. For a sunken middle, your cheesecake likely needed more baking time—cover with fresh berries or whipped cream to disguise it. If your crust gets soggy, try pre-baking it for 10 minutes before adding the filling next time. Water bath leakage? Use extra-wide heavy-duty foil and consider placing your wrapped springform inside a slow cooker liner for foolproof protection. Remember, even an imperfect cheesecake is still delicious!
Frequently Asked Questions
Can I make this New York Cheesecake with Berry Twist ahead of time?
Absolutely! In fact, I recommend making it 1-2 days in advance. The flavors meld beautifully with time, and the texture becomes even more velvety after a night in the refrigerator.
What’s the secret to preventing cracks?
Don’t overmix your batter (which incorporates air), use a water bath, and allow the cheesecake to cool gradually in the turned-off oven with the door slightly ajar for about an hour before removing.
Can I use frozen berries instead of fresh?
Yes! Thaw them completely and drain excess liquid before pureeing. This makes the recipe perfect year-round when certain berries aren’t in season.
My cheesecake is still jiggly in the center. Is it done?
A slight jiggle in the center (about 2-3 inches) is perfect. The residual heat will continue cooking it as it cools, and it will firm up completely in the refrigerator.
Can I make this recipe without a springform pan?
While a springform pan is ideal, you can use a deep pie dish lined with parchment paper. The slices won’t be as neat, but the flavor will be just as delicious.
Final Thoughts
This New York Cheesecake with Berry Twist has become my signature dessert for good reason—it strikes that perfect balance between impressive and achievable. The contrast between the creamy, tangy filling and the vibrant berry swirl creates a dessert that feels both classic and modern. I love how it can be dressed up for special occasions or enjoyed on a quiet evening when you need something special. The versatility of this recipe means it can evolve with the seasons while maintaining that core deliciousness that makes everyone ask for seconds. Give it a try, and I promise it will become a staple in your dessert repertoire too! For more sweet inspiration, follow me on Pinterest.